Showing posts with label banners. Show all posts

Tuesday, 3 December 2013

Our Christmas banner 2013


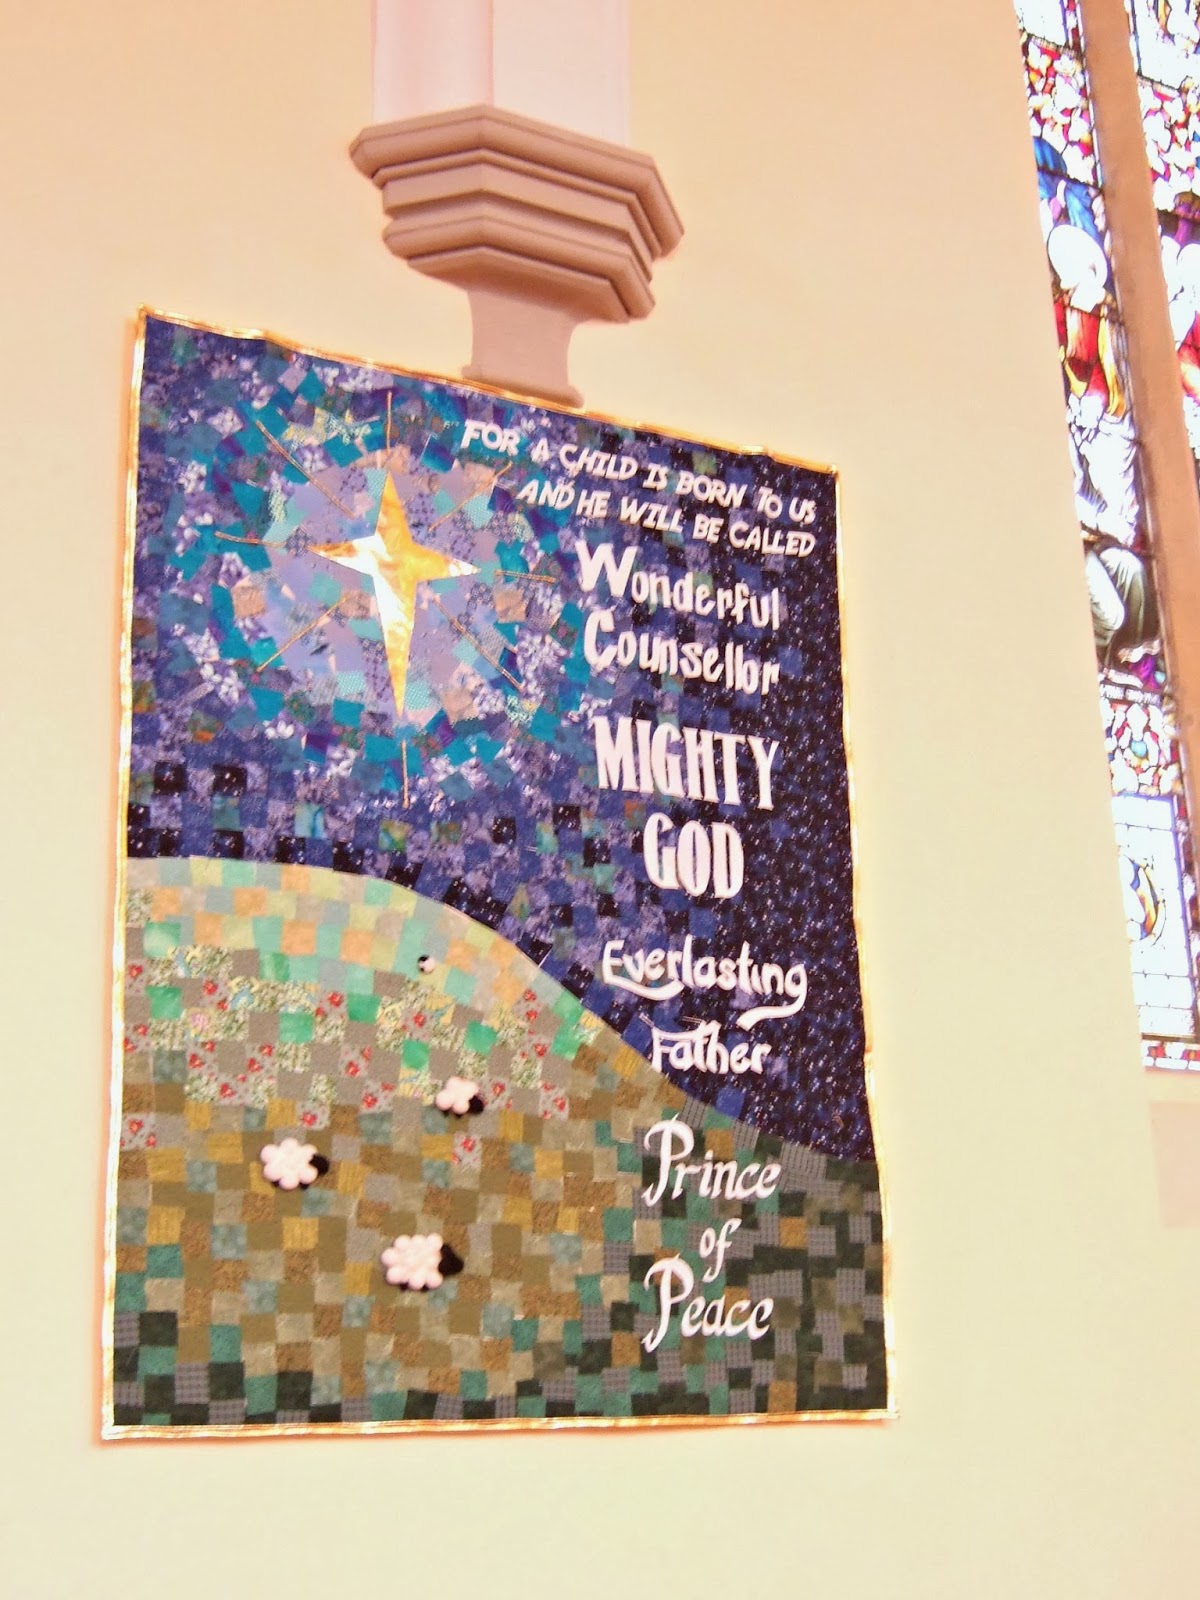
Here is our craft group's finished Christmas banner. We had lots of lovely comments from members of the church on Sunday and everyone in the group is really pleased with how it's turned out.

The background is made of 2" squares of blue and green fabrics with Bondaweb on the back of each one and then ironed in place. We used a LOT of Bondaweb!


The star is made from gold fabric which was also used to bind the edges of the banner and looks very festive. As we are beginners to making banners there are lessons learned from every one we make. This time I could have used much thicker gold cord as the star's rays.


And , of course, we had to have sheep on the banner this year. Why sheep? Our church have a knitted sheep trail around our town to encourage people to come to a Christmas church service. Some of the kids in our church have made a fantastic video to promote the sheep trail. I'm not technically minded and can't get the video to appear on here , but you can see it on YouTube HERE.

Wednesday, 23 October 2013

A Christmas banner design - with added sheep

Our Create group has started working on a banner to hang in the church over Christmas. We have a fun project going on at the moment where lots of people in the church have knitted sheep (there are 30) all from the same pattern. 24 sheep will be hidden around our town in the style of a treasure hunt and 6 will be in various churches. This is all happening around Christmas to encourage people to think about coming to church to celebrate Christmas.

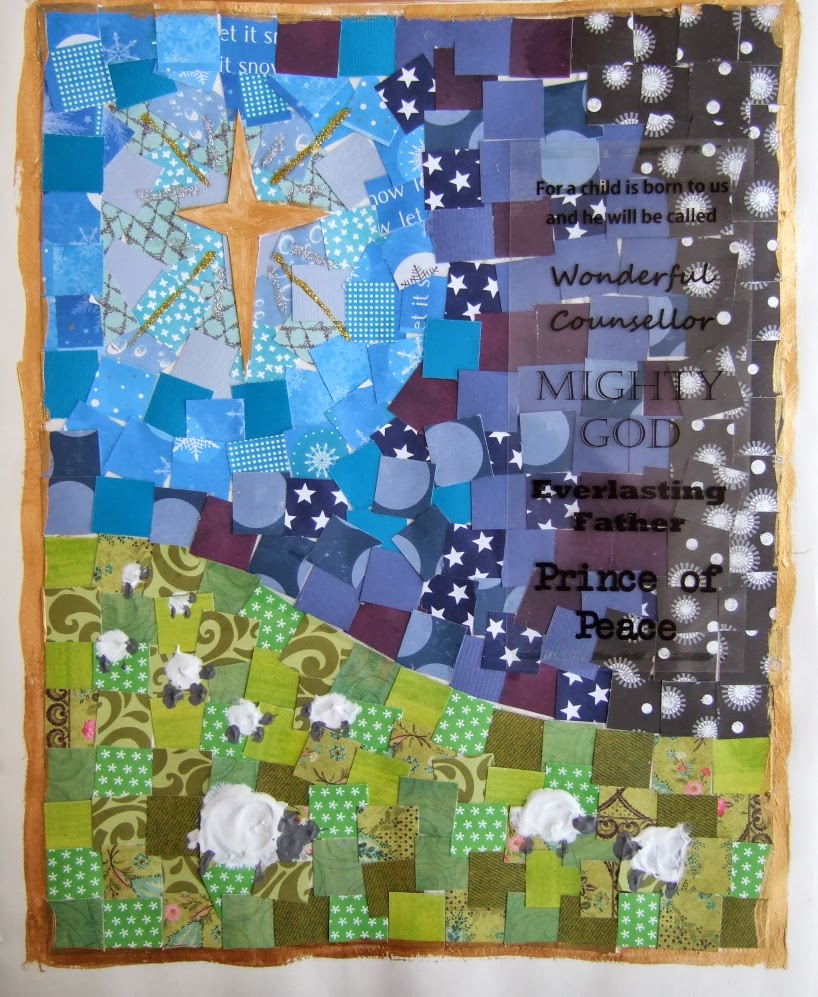
I wanted to continue the sheep theme on our Christmas banner. This is the page in my sketchbook that I put together to show the members of the group what we are working towards. Using lots of squares of fabric to create the background is a great way to use up my fabric (I have quite a lot!).


The words on the actual banner will be in white not black.

I made the sheep using moulding paste and paint. The sheep on the finished banner will be made from felt pebbles.

Sunday, 11 August 2013

Creation story - a kids banner


I was helping out at Sunday school a couple of months ago and we were looking at the beginning of Genesis and my friend asked if we could make some kind of mural/banner to go in the room at the back of the church. This is where there are a selection of toys for younger children to play with during the service and we thought it could do with a bit of brightening up. 

I knew instantly what to do as I have been looking at this "make your own wall hanging" from Baker Ross for a while. The pack comes with 32 fabric squares which are ready hemmed and have holes cut in each corner. The pack also includes lots of brightly coloured ribbons to tie the squares together. I assembled lots of fabrics and cut out some squares as backgrounds and then used Bondaweb to trace and cut out some silhouettes of plants/flowers/fish/animals etc. I took the squares along to Sunday school and the kids (aged 4-7) added lots of details to the squares using fabric felt tip pens.


When I got the squares home I used fabric paint and foam stamps for the larger letters and StazOn ink with clear acrylic stamps for the smaller lettering. I based the words on The Message translastion of Genesis. I also used Bondaweb to iron on some thick calico backing onto the squares as the original fabric is quite thin and I wanted the finished banner to be quite robust.


I stitched on buttons and charms to the squares too. 


We had fun hanging it up. We aren't allowed to drill holes into the walls without special permission but luckily there were two existing hooks. The hooks are very, very high above a window. A friend and I scaled the ladder to hang two chains from the hooks which came down to below the window and then a curtain pole was hung from the chains. It's nearly straight too!


We've had lots of great comments about how well it's turned out and the kids are very proud of their handiwork.

Tuesday, 29 January 2013

Romans 12 v 12 (and a PVA fabric resist)


We had a Women's Day at our church this weekend and the verse from Romans 12 v 12 was used on the day with the theme of Hope. The day went really well with over 130 people coming along to it.

I had fun making the banner as I tried out a new resist technique. I started with a white piece of fabric and then I painted the large words using a cheap kids PVA glue (labelled "washable") and let it dry completely. I pinned the fabric up on the wall and projected the words on to it so that they would be neat, but I stuck bin bags to the wall behind the fabric as I was worried I would glue the whole thing to the wall!


The next step was to cover the banner in fabric paint, and I was really pleased with how it turned out as it reminded me a little of a Kandinsky painting. I painted some white fabric paint onto some bubble wrap and printed some circles with it.

When the paint was dry I gave it a quick iron and then left it to soak in tepid water in the bath for half an hour and then scrubbed off the PVA glue. I was so happy when I saw it had actually worked! Then I washed and dried it in the washing machine / tumble drier.

I had some members from my banner team come round to my house and help cut out the black letters which we ironed on and then I pinned it together with very heavy calico on the back to give it some weight so it will hang nicely. I then stitched around the white circles - I love how this looks, even though you can't really see it in the church setting.

I bound the edges with red fabric and had some help hanging it up in church (It's up so high!).


I've had some lovely comments back from church already and so now my thoughts are turning to a design for Easter which we can work on as a group.

Tuesday, 6 November 2012

Praise God from whom all blessings flow - a banner


Wow, it been ages since I've written on here. Life has been so busy with the daily challenges of family life and lots of crafting added in too. The exciting news is that I have finished my first banner - yay! Our church moved back into our newly renovated building on Sunday and it was such an exciting day. It's a fantastic place which can be used by so many people in our community now. It's such an opportunity to bless others.

So, here's my banner. It was running around in my head for ages and it finally came together on fabric last week. I've had lots of lovely comments already from friends at church.


It started out as a patchwork of different fabrics which I ironed onto a backing piece of calico using Bondaweb. I bought a complete roll of Bondaweb before I started - 30m should keep me going for a while.


I did some free-motion stitching around some of the squares as I didn't completely trust the Bondaweb and had images of the whole thing peeling away from the backing cloth half way though a service. The stitching is completely invisible once you take two steps back from the banner, which is something to bear in mind for future projects.


I projected a line drawing of the church onto the banner and drew around it with a pencil before painting over the lines using brown fabric paint and a fairly thick paintbrush. I drew around a few of the kids at Sunday school and cut out the paper to make stencils. I used some spray inks from my scrapbooking stash to make the silhouettes (with varying success - Maya Mist doesn't seem to like fabric much).

The letters were traced onto Bondaweb (reversed) and then ironed onto black fabric before being cut out.


There is a backing of very heavy calico behind the banner to give it weight so it would hang nicely and then the edges were bound with red fabric.

I now have a team of 7 people to help me with the next banners, which are going to be Christmassy and (hopefully) quite sparkly.

Here's how our church looks now...

Sunday, 13 November 2011

A banner group visit

This week has marked a step forward in my journey towards making church art. I submitted a proposal to start a new banner group at our Ecumenical Church Council and it was given the go-ahead. So it's all official now.

I spent Tuesday afternoon with the talented ladies at the banner group at our sister church in the town. I found it quite overwhelming to look through their catalogue of banners which have been produced over the last twenty years. Each banner had a story behind it and there was such thought and consideration put into each one. The ladies of the group were lovely and very generous with their valuable advice about things they have learnt over the years.

They started the group with a Bible reading and a prayer time as well as their Banner group prayer. It was great to start with that focus on why we were there.

Things I learnt from them about producing banners were...
  • Artwork has to be clear and bold to be seen across such a large space.
  • White backgrounds and cream backgrounds on white or cream walls don't work.
  • Graduated colours can be achieved layering coloured net.
  • Using italic text can be tricky , as each letter has to have the right angle.
  • Black outlines can add definition if the background and image are similar in tone.
This is their banner group prayer...

"Oh Lord, who has created all,
each leaf and blossom great and small,
look down and bless our work today,
guide our eyes and hands we pray,
that we within you church may make,
a worthy offering for your sake."